What is Pulse Oximetry? | Cables & Sensors
What is Pulse Oximetry
Pulse oximetry is a simple and painless test that measures one's oxygen saturation levels (SpO2) and pulse rate. Simply put, it rapidly measures how much oxygen there is in the blood and how efficiently it is being carried into the farthest extremities of the body, including the arms and legs.
Pulse oximetry is a noninvasive procedure, which means it does not introduce any instrument into the body. In fact, it is done using only a small, clip-on device called the pulse oximeter sensor, which is attached to a part of the body, usually on a finger, toe, or earlobe. Pulse oximetry sensors vary in size and shape and are offered in both reusable and single-use applications.
The procedure is often utilized in the critical care setting and in doctors' offices because of its portability and efficiency.
This guide will tell you everything you need to use a pulse oximeter to monitor oxygen saturation levels, whether in the hospital or home setting.
Let's get started.


Chapter 1:
Uses and benefits
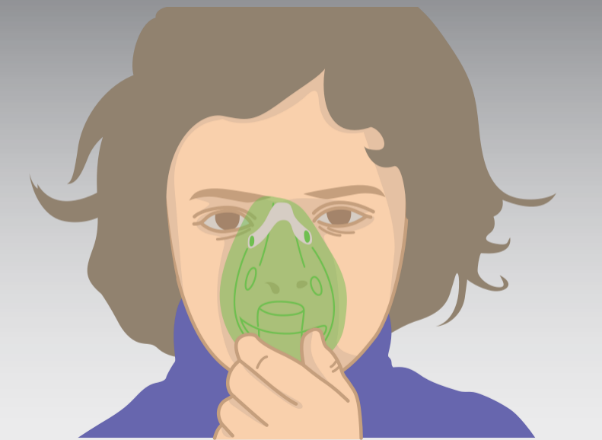
People need oxygen not only to breathe but also to survive. When there is little to no oxygen in the body, our cells will begin to deteriorate, leading to life-threatening symptoms such as organ failure and the body ultimately dies.
In a nutshell, oxygen is transported to different parts the body once it is filtered via the lungs.
Oxygen is then transported into individual cells through a pigment called hemoglobin found in the red blood cells.
The purpose of pulse oximetry is to measure the amount of oxygen found in these hemoglobin proteins, indicating one’s oxygen saturation.
Normal (peripheral) oxygen saturation levels fall between 95 to 100 percent A reading lower than 90 percent is already considered a clinical emergency.
Indications
There are various factors that indicate the use of pulse oximetry. Aside from being used in routine checks, pulse oximeters are mainly used in individuals who have health conditions or under clinical situations that may affect oxygen saturation levels, such as:
- Cardiac arrest
- Asthma or any type of chronic obstructive pulmonary disease (COPD)
- Acute respiratory distress syndrome
- Endotracheal intubation
- Sleep apnea
- Any other respiratory complaints
Both patients and healthcare providers can use pulse oximetry in the clinical setting, such as by:
- Providing feedback about the efficacy of breathing interventions and therapies (e.g. the use of ventilators)
- Assessing whether or not a physical activity is safe in patient with respiratory or cardiovascular problems
- Monitoring of a patient’s oxygen saturation during a stress test
- Monitoring of oxygen saturation over a period of time
- Alerting the healthcare team to critically low oxygen levels, specifically in newborns
- Evaluating if supplemental oxygen is necessary
- Keeping track of oxygen saturation in patients under general anesthesia
- Indicating any adverse effects in individuals taking medications that potentially cause breathing difficulty or low oxygen saturation
Other benefits
There’s a reason why pulse oximeters are widely used in medical facilities, doctors’ clinics, and even in patients’ homes.
Generally, they provide accurate and on-the-spot readings, which is a valuable feature, especially in emergency cases.
Patients and healthcare practitioners alike find pulse oximeters as efficient medical tools because they are:
- Affordable and simple to use
- Efficient, non-invasive, and painless
- Essential in the monitoring of certain chronic illnesses and health conditions
- Ideal for continuous use, which is beneficial for patients with certain sleep conditions (e.g. sleep apnea)
- Effective in keeping oxygen use accurate
- Able to alert patients and caregivers early on of oncoming or existing low blood oxygen saturation levels
- Useful in recording oxygen saturation trends (e.g. during physical activity) for patients to easily adjust the amount of oxygen according to their needs
Chapter 2:
How it works
Pulse oximetry is done with the use of red and infrared light. When a pulse oximeter is clipped onto a body part, one side shines red and infrared LEDs through a relatively transparent portion of the skin, usually where there is good blood flow, while the other side receives that light.

The principle of this technology is that oxygenated hemoglobin can absorb more of the infrared light, allowing more red light to pass through.
On the other hand, deoxygenated hemoglobin absorbs more of the red light, allowing more of the infrared light to pass through.
Simply put, the ratio of red to infrared light transmitted through the blood provides the oxygen saturation measurement.
Initially, the device sums up the intensity of both lights to represent both fractions of oxygenated and deoxygenated blood. Then, the device detects the pulse and then subtracts the detected color intensity if the pulse is absent.
The remaining intensity should represent the blood with oxygen, which is then displayed as a percentage of oxygen saturation on the electronic screen of the pulse oximeter.
Chapter 3:
Pulse oximetry techniques
Pulse oximetry can be used in inpatient, outpatient, or even home settings when recommended by the doctor. It can be done through one of these pulse oximetry approaches:
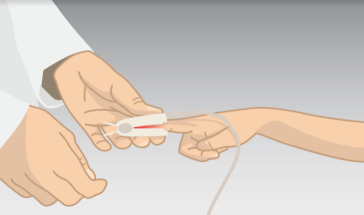
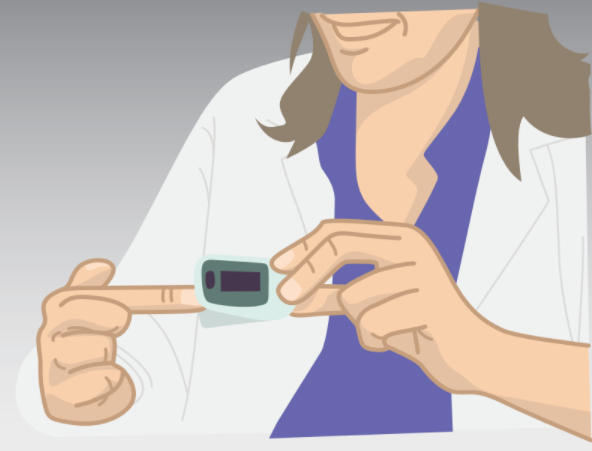
Finger approach
The digit or finger approach is the most commonly preferred method of acquiring a patient’s pulse oximetry.
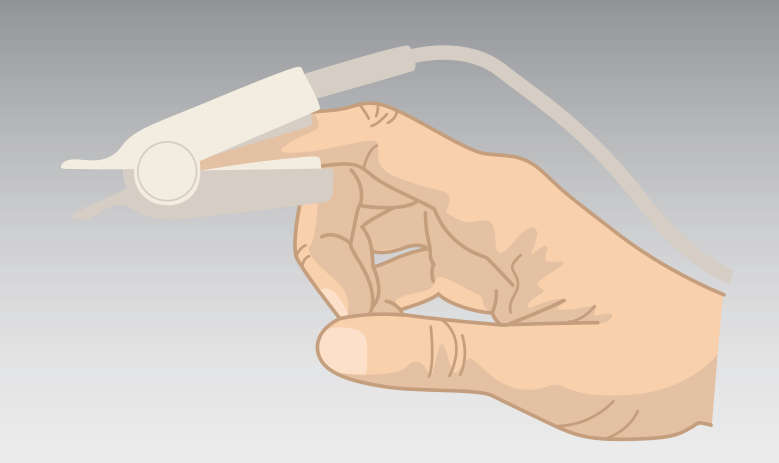
Using this technique, the probe should be well-positioned on the finger, making sure that the device is not clipped on too tight (which would constrict the circulation) or too loose (which may fall off or let other light in).
The patient should feel a small amount of pressure, yet there should be no pain involved during the procedure. Keep the device on until it indicates both your pulse and oxygen saturation. Once the reading is done, the device is then removed from the finger.
Ear approach
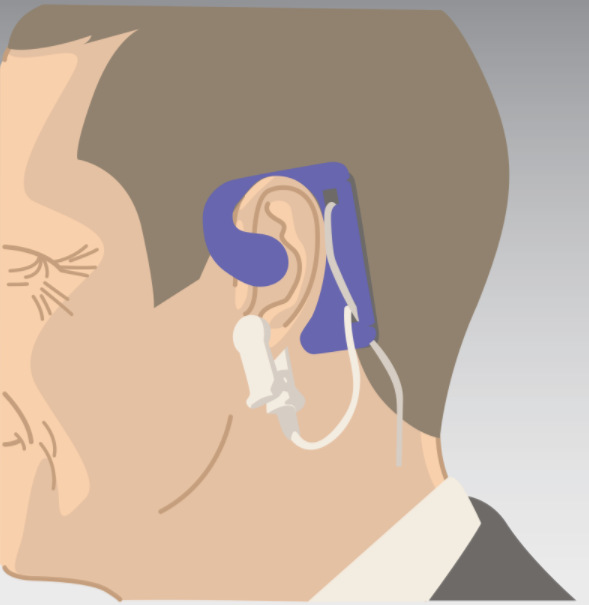
Pulse oximetry can be obtained through the ear approach. With this technique, the transmission probe is clipped on the patient’s earlobe, wherein it is connected to the monitoring unit that displays the oxygen saturation level.
Palm or foot approach
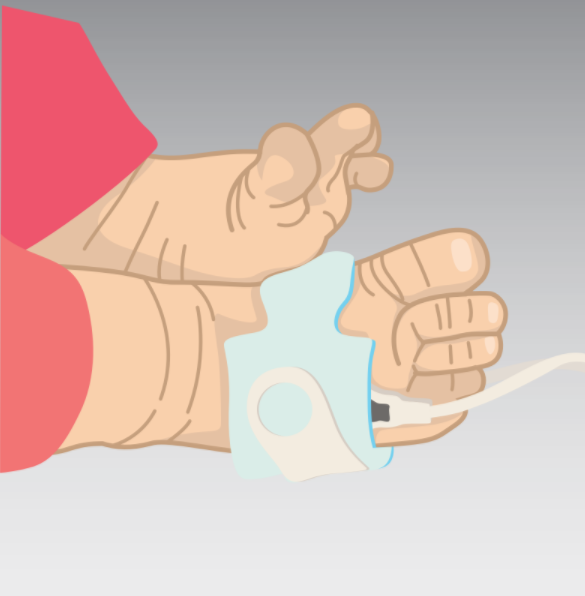
In the case of neonates, wherein the finger or ear may still be too small to place the clip onto, the pulse oximeter probe may be attached over the infant’s palm or foot.
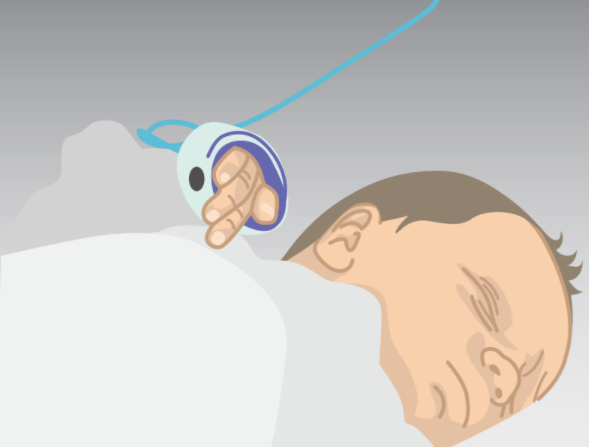
Forehead approach
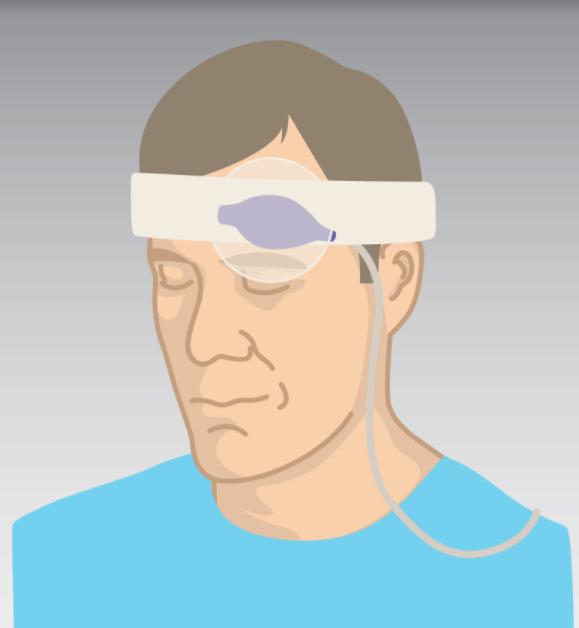
In more rare cases, wherein the digits and ear are inaccessible, a pulse oximetry reflectance probe may be attached low across the forehead and just right above the eyebrows, making sure that it is placed away from a major vessel.
When using this approach, the patient should be positioned in an inclined manner. A headband is then strapped across the forehead over the probe to keep it in place.
Chapter 4:
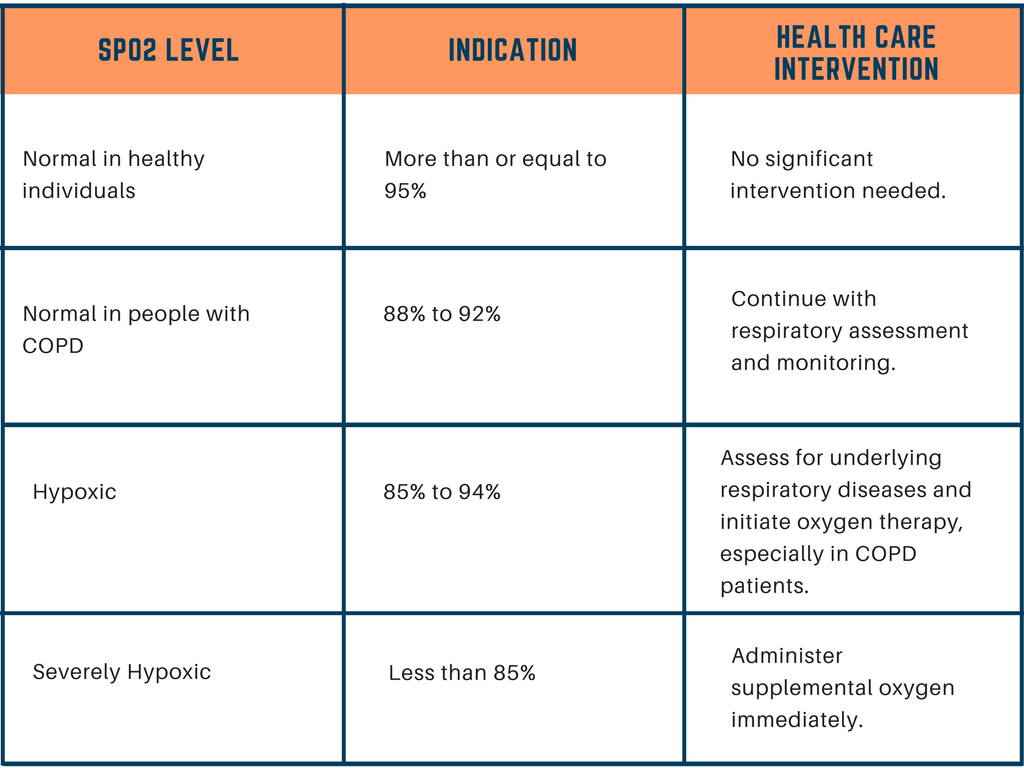
Pulse oximetry readings
Normally, more than 89 percent of the blood should be carrying oxygen, which is the adequate amount of oxygen needed to keep the cells healthy and the body fully functioning.
When a person’s blood oxygen saturation levels are below normal, this condition is known as hypoxemia, which could be related to a problem in breathing or circulation and could lead to symptoms such as shortness of breath.
The first saturation reading that is below the normal levels may be inaccurate and will not cause damage, but consistent readings of this result can be damaging to the person.
Most healthy individuals usually get an oxygen saturation level of 95 percent. On the other hand, individuals with 92 percent oxygen saturation may indicate a deficiency in oxygen reaching the body’s organs and tissues or potential hypoxemia.
Chapter 5:
Limitations to pulse oximetry
While pulse oximetry is a fairly accurate test that provides results within only a 2-percent difference from the actual reading, certain factors may impact its accuracy.
Nail polish
Putting on the probe on a finger with nail polish or any pigment on the finger can interfere with pulse oximetry readings as the color can absorb the emitted light, making it unable to detect oxygenated hemoglobin.
Before clipping on the probe to a patient’s finger or toe, check for the presence of nail varnish and have it removed. If it is not possible to remove the varnish from the finger before the test, as in emergency cases, you may turn the probe sideways or find another possible site to place the probe.
Exposure to direct bright light
Other factors that may affect pulse oximetry readings include having direct bright light shining at the probe, such as sunlight or operating light.
Although the device has soft rubber that shields it from light, it may not be able to avoid bright light shining directly on the device. Make sure to perform the procedure in a room with adequate lighting.
Patient movement
Patient movement can cause inaccurate reading as the probe easily dislodges. With this, if the patient is shivering or fussy, you may hold the hand steady or wait until the shaking has dispersed before resuming the test.
Other limitations of pulse oximetry also include changes in the patient’s pulse, carbon monoxide poisoning, lipids in blood plasma, bilirubin levels, or having cold, clammy hands or poor circulation.
Chapter 6:
Pulse oximetry procedure checklist
To properly perform pulse oximetry, prepare all necessary equipment and materials, which includes the pulse oximeter, sensor probe, alcohol pads, and in some cases, nail polish remover.
Once you have explained the purpose and process of the procedure to the patient, you may begin with the following steps:
- Select a finger (or any other site possible when the finger is not accessible) to place the probe, making sure existing nail polish or fake fingernail are removed from the test site.
- Attach the probe on the finger, ensuring that the light beam and sensor are positioned opposite each other.
- Make sure the patient’s hand is positioned at heart level.
- Turn on the device and watch out for a beep sound followed by the device’s display.
- Wait for the reading, which usually displays after four to six heartbeats.
- Remove the probe from the patient’s finger.
- Record the reading.
- Clean the probe between patients. When using a disposable probe, discard as needed.
Chapter 7:
Choosing a pulse oximeter
Your healthcare provider may require you to measure your oxygen saturation at home, but before you start purchasing a pulse oximeter, consult with your doctor first on which unit to buy.
Pulse oximeters come in different types and features, and it is best to know which ones will work best for you.
For example, if you only need to check your blood oxygen levels periodically, the small, clip-like pulse oximeter should work just fine for you.
In some cases, however, such as in individuals with a chronic illness, they may need a model that is built for constant use to keep up with continuous monitoring.
If your doctor requires it, you may need to secure a pulse oximeter that comes with a heart rate monitoring feature.
There are different types of pulse oximeters, though they basically perform the same function that is to measure blood oxygen saturation levels. However, each type comes with their specific pros and cons.
Fingertip oximeter
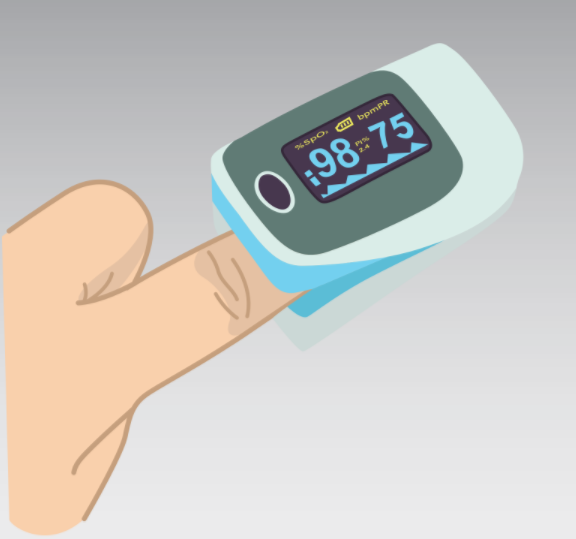
There’s the portable type or the finger pulse oximeter , which is the most commonly used version at home, as well as in hospitals, clinics, and other medical facilities.
This type of pulse oximeter proves to be most efficient in monitoring blood oxygen levels as it is portable, convenient, affordable, and simple to use.
Handheld oximeter
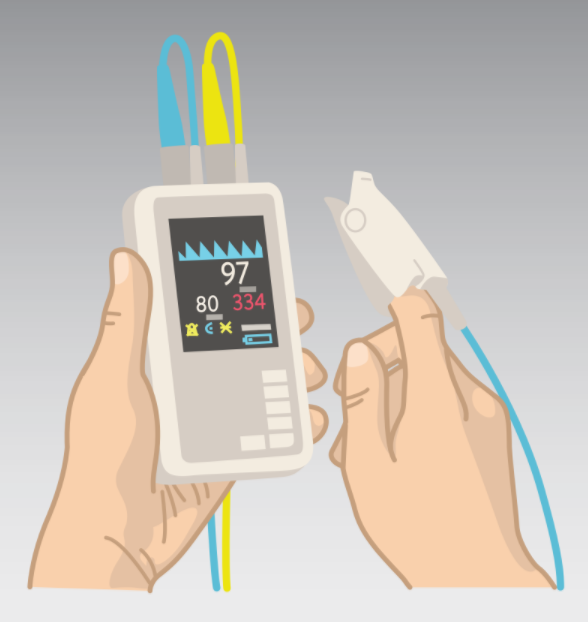
The handheld oximeter is another pulse oximeter type that is mostly used in medical facilities as it provides more accurate readings in both spot checks and continuous monitoring.
Usually utilized in the hospital as well as in ambulatory health settings or EMS, the handheld oximeter involves a probe that is attached to a cable that is then attached to a monitor.
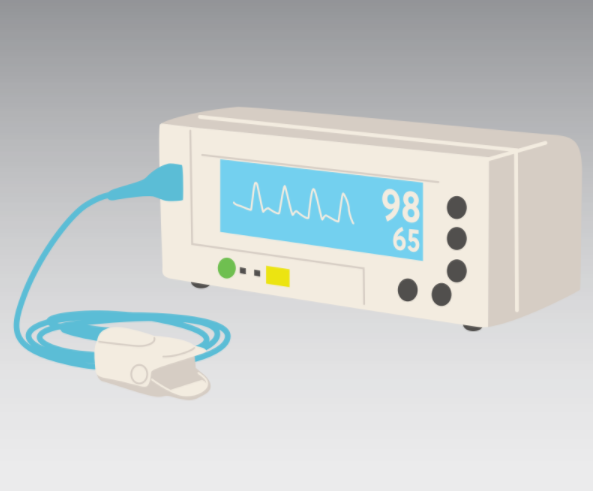
Tabletop oximeter
Usually bigger in size compared to a handheld pulse oximeter, the tabletop oximeter is also able to perform on-the-spot readings and continuous oxygen saturation monitoring. It is ideal in hospitals as well as in subacute settings.
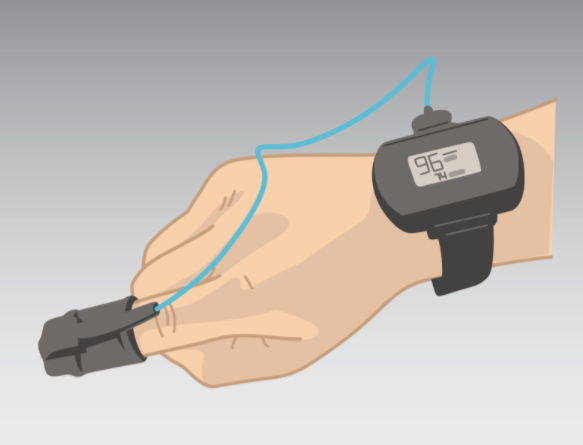
Wrist-worn sensors
This wireless model is usually preferred for continuous monitoring of a patient’s blood oxygen saturation, which is ideal in patients who need monitoring on a daily basis or during their sleep.
Worn on the wrist just like a wristwatch, this type of pulse oximeter has its probe placed on the index finger and connected to a small monitor on the wrist.
Fetal pulse oximeter
This type of oximeter is intended to fit snugly on a neonate’s small fingers. Other varieties are designed to fit an infant’s foot or head, in case the fingers are too small to fit the probe.
With the variety of options available, it is truly important that you discuss with your practitioner first so he or she can help narrow down your specific needs to make it easier for you to find the right unit to purchase.
Chapter 8:
What’s next?
A pulse oximeter can provide oxygen saturation measurement rapidly, so your healthcare provider should be able to record the readings immediately. The results may be used to determine if further testing or appropriate treatment is necessary.
For instance, your doctor may be evaluating the effectiveness of your oxygen supplementation therapy through pulse oximetry. If the reading is still low, this may indicate the need to resume the therapy or to administer more oxygen.
Your doctor will discuss the next steps with you, especially if your condition is being evaluated particularly with the help of pulse oximetry. If you measure your oxygen saturation at home, you may be advised to make a record of your readings and taught what to do once they go below or above the normal levels.
Tips for Home Use
Depending on your condition, your doctor may recommend that you secure a pulse oximeter device that you can use at home.
You will be given specific instructions on how you can properly measure your oxygen saturation levels, which includes the following:
- Check your oxygen saturation levels at various times of the day or during physical activity, as indicated by your doctor. Be sure to keep a log of your readings to help your doctor assess your condition.
- Using your record, work closely with your doctor on how you can achieve or maintain your ideal oxygen saturation level.
- If you are under oxygen therapy, never titrate oxygen without the recommendation of your healthcare provider.
- Never depend on the pulse oximeter reading if you are actually feeling otherwise. If you feel short of breath even with a normal pulse oximeter reading, don’t hesitate to contact your healthcare provider as soon as possible.
- Notify your doctor immediately if you notice a sudden drop in your oxygen saturation level as this could be a sign of trouble.
Use the SpO2 activity log sheet to record your activity and oxygen saturation at home so you can discuss and share this information with your doctor.

Takeaway
Pulse oximetry is a fairly reliable procedure, as it is quick and completely painless. The patient does not face any risks during the test, aside from very few cases of skin irritation from the pulse oximetry sensors adhesive attached to some pulse oximeters.
Overall, it is a helpful tool which provides relevant data to competent health professionals in the evaluation and treatment of their patients.